Complete Deployment Example
In this section we will start with nothing except your local laptop or desktop computer, create a BOSH environment using VirtualBox, and deploy the zookeeper cluster we frequently refer to in the Ultimate Guide to BOSH.
Dependencies
You will need the bosh CLI.
For our VirtualBox environment you will also need to download and install Oracle VirtualBox.
Install the git CLI to allow us to clone the bosh-deployment and zookeeper-release project repositories.
Create workspace
mkdir -p ~/workspace
cd ~/workspace
Create BOSH environment
We have not yet discussed how to create a BOSH environment for your cloud infrastructure. We will absolutely 100% discuss this topic for your cloud infrastructure. Later. For now, we will copy and paste some instructions that will setup a BOSH environment to use VirtualBox.
Create a workspace folder and clone the bosh-deployment repository. It contains nearly everything you need to create a BOSH environment for your cloud infrastructure.
mkdir -p bosh-env-vbox
cd bosh-env-vbox
git clone https://github.com/cloudfoundry/bosh-deployment
The following fully-formed command will download the remaining dependencies (for example the VirtualBox CPI, the bosh BOSH release, etc), provision a new VirtualBox VM, and use it to run the BOSH director and other subsystems of a BOSH environment:
bosh create-env bosh-deployment/bosh.yml \
  --state vbox/state.json \
  -o bosh-deployment/virtualbox/cpi.yml \
  -o bosh-deployment/virtualbox/outbound-network.yml \
  -o bosh-deployment/bosh-lite.yml \
  -o bosh-deployment/bosh-lite-runc.yml \
  -o bosh-deployment/jumpbox-user.yml \
  -o bosh-deployment/uaa.yml \
  -o bosh-deployment/credhub.yml \
  --vars-store vbox/creds.yml \
  -v director_name="Bosh-Lite-Director" \
  -v internal_ip=192.168.50.6 \
  -v internal_gw=192.168.50.1 \
  -v internal_cidr=192.168.50.0/24 \
  -v outbound_network_name=NatNetwork
Visit the VirtualBox application to confirm a new VM has been created:
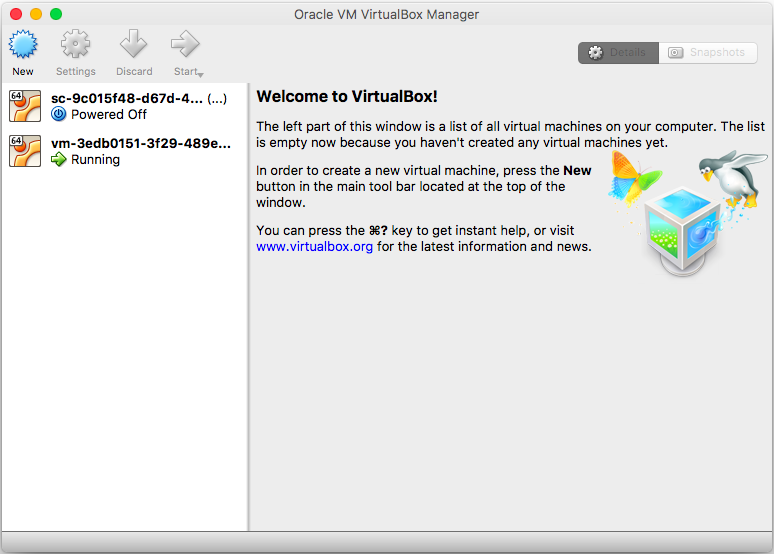
TODO write nice text
bosh -e 192.168.50.6 alias-env vbox --ca-cert <(bosh int vbox/creds.yml --path /director_ssl/ca)
bosh int vbox/creds.yml --path /admin_password
export BOSH_ENVIRONMENT=vbox
bosh login
bosh update-cloud-config bosh-deployment/warden/cloud-config.yml
wget --content-disposition https://bosh.io/d/stemcells/bosh-warden-boshlite-ubuntu-xenial-go_agent
bosh upload-stemcell bosh-stemcell-*-warden-boshlite-ubuntu-xenial-go_agent.tgz
SSH into BOSH Environment
mkdir ssh
chmod 700 ssh
bosh int vbox/creds.yml --path /jumpbox_ssh/private_key > ssh/vbox.pem
chmod 600 ssh/vbox.pem
ssh-add ssh/vbox.pem
Now you can SSH into your BOSH environment using jumpbox user:
ssh jumpbox@192.168.50.6
Deploy ZooKeeper
Return to the workspace parent directory:
cd ~/workspace
Create a workspace folder for our zookeeper deployment and its dependencies:
mkdir -p zookeeper-demo
cd zookeeper-demo
Using environment variables we now target our BOSH environment and the BOSH deployment by name:
export BOSH_ENVIRONMENT=vbox
export BOSH_DEPLOYMENT=zookeeper
Alternately to using these two environment variables, in the subsequent bosh commands you could use bosh -e vbox -d zookeeper. You might see these two flag options used in other documentation or examples as you start using BOSH outside of this Ultimate Guide to BOSH. I prefer using the environment variables. Author's privilege.
Clone the zookeeper-release, which contains the base deployment manifest:
git clone https://github.com/cppforlife/zookeeper-release
cat zookeeper-release/manifests/zookeeper.yml
This base deployment manifest is lovely. It has no Variables; it "Just Works".
We can confirm that our BOSH_DEPLOYMENT name is correct:
bosh int zookeeper-release/manifests/zookeeper.yml --path /name
Alternately, we could use this command to set the BOSH_DEPLOYMENT variable:
export BOSH_DEPLOYMENT=$(bosh int zookeeper-release/manifests/zookeeper.yml --path /name)
We can now use our VirtualBox BOSH environment to deploy our zookeeper cluster:
bosh deploy zookeeper-release/manifests/zookeeper.yml
This bosh will first begin to download the zookeeper BOSH release because the corresponding BOSH release version has not been uploaded yet.
Next, the CLI will display the proposed changes to the deployment. Since we are creating a new deployment, everything is new:
+ stemcells:
+ - alias: default
+   os: ubuntu-xenial
+   version: '621.78'

+ releases:
+ - name: zookeeper
+   url: git+https://github.com/cppforlife/zookeeper-release
+   version: 0.0.10

+ update:
+   canaries: 2
+   canary_watch_time: 5000-60000
+   max_in_flight: 1
+   update_watch_time: 5000-60000

+ instance_groups:
+ - azs:
+   - z1
+   - z2
+   - z3
+   instances: 5
+   jobs:
+   - name: zookeeper
+     properties: {}
+     release: zookeeper
+   - name: status
+     properties: {}
+     release: zookeeper
+   name: zookeeper
+   networks:
+   - name: default
+   persistent_disk: 10240
+   stemcell: default
+   vm_type: default
+ - azs:
+   - z1
+   instances: 1
+   jobs:
+   - name: smoke-tests
+     properties: {}
+     release: zookeeper
+   lifecycle: errand
+   name: smoke-tests
+   networks:
+   - name: default
+   stemcell: default
+   vm_type: default

+ name: zookeeper-demo

Continue? [yN]:
Press y to continue.
The BOSH environment will now be provided with the deployment manifest, and will in turn perform all the activities necessary to create our new deployment.
Initially it will need to compile the packages within the zookeeper BOSH release, since it has not compiled them already. It will not perform this task again on subsequent deployments.
Task 4 | 08:40:43 | Preparing deployment: Preparing deployment (00:00:00)
Task 4 | 08:40:43 | Preparing package compilation: Finding packages to compile (00:00:00)
Task 4 | 08:40:43 | Compiling packages: golang-1.8-linux/3eac55db0483de642b1be389966327e931db3e3f
Task 4 | 08:40:43 | Compiling packages: zookeeper/43ee655b89f8a05cc472ca997e8c8186457241c1
Task 4 | 08:40:43 | Compiling packages: java/c524e46e61b37894935ae28016973e0e8644fcde
Task 4 | 08:41:36 | Compiling packages: zookeeper/43ee655b89f8a05cc472ca997e8c8186457241c1 (00:00:53)
Task 4 | 08:42:01 | Compiling packages: java/c524e46e61b37894935ae28016973e0e8644fcde (00:01:18)
Task 4 | 08:42:07 | Compiling packages: golang-1.8-linux/3eac55db0483de642b1be389966327e931db3e3f (00:01:24)
Task 4 | 08:42:08 | Compiling packages: smoke-tests/ec91e258c41471227a759c2749e7295cb65eff5a (00:00:08)
Next, the BOSH environment will provision "missing vms" within its cloud environment.
Task 4 | 08:42:17 | Creating missing vms: zookeeper/262baa62-d027-4dbc-b3be-b5bacd86cd20 (3)
Task 4 | 08:42:17 | Creating missing vms: zookeeper/4c77e4e4-5452-4af0-afab-05f4f75bdaf3 (2)
Task 4 | 08:42:17 | Creating missing vms: zookeeper/05027f6c-c13f-493f-9f32-d45c46df34c0 (4)
Task 4 | 08:42:17 | Creating missing vms: zookeeper/c80f4fd5-3d31-4c1a-a82c-68a166fad0a0 (0)
Task 4 | 08:42:17 | Creating missing vms: zookeeper/247623ea-8427-4f4a-939c-691faa7ef31f (1)
Task 4 | 08:43:10 | Creating missing vms: zookeeper/262baa62-d027-4dbc-b3be-b5bacd86cd20 (3) (00:00:53)
Task 4 | 08:43:10 | Creating missing vms: zookeeper/05027f6c-c13f-493f-9f32-d45c46df34c0 (4) (00:00:53)
Task 4 | 08:43:11 | Creating missing vms: zookeeper/c80f4fd5-3d31-4c1a-a82c-68a166fad0a0 (0) (00:00:54)
Task 4 | 08:43:11 | Creating missing vms: zookeeper/4c77e4e4-5452-4af0-afab-05f4f75bdaf3 (2) (00:00:54)
Task 4 | 08:43:11 | Creating missing vms: zookeeper/247623ea-8427-4f4a-939c-691faa7ef31f (1) (00:00:54)
Finally, the BOSH environment will update these five instances in small Update Batches. Two initial canaries, and then one subsequent instance at a time:
Task 4 | 08:43:11 | Updating instance zookeeper: zookeeper/c80f4fd5-3d31-4c1a-a82c-68a166fad0a0 (0) (canary) (00:00:40)
Task 4 | 08:43:51 | Updating instance zookeeper: zookeeper/262baa62-d027-4dbc-b3be-b5bacd86cd20 (3) (canary) (00:00:39)
Task 4 | 08:44:30 | Updating instance zookeeper: zookeeper/05027f6c-c13f-493f-9f32-d45c46df34c0 (4) (00:00:39)
Task 4 | 08:45:09 | Updating instance zookeeper: zookeeper/247623ea-8427-4f4a-939c-691faa7ef31f (1) (00:00:38)
Task 4 | 08:45:47 | Updating instance zookeeper: zookeeper/4c77e4e4-5452-4af0-afab-05f4f75bdaf3 (2) (00:00:36)
Finally, the CLI will summarise the time taken to complete the bosh deploy task:
Task 4 Started  Tue Oct 10 08:40:43 UTC 2017
Task 4 Finished Tue Oct 10 08:46:23 UTC 2017
Task 4 Duration 00:05:40
Task 4 done
We can now see our five instances running:
> bosh instances
If we do not have BOSH_ENVIRONMENT and BOSH_DEPLOYMENT environment variables set, then we need to pass the -e and -d flags:
bosh -e vbox -d zookeeper instances
The output will be similar to:
Using environment '192.168.50.6' as client 'admin'

Task 5. Done

Deployment 'zookeeper-demo'

Instance                                          Process State  AZ  IPs
smoke-tests/d688f60e-d34c-4e95-9a2c-44d246ad08b7  -              z1  -
zookeeper/05027f6c-c13f-493f-9f32-d45c46df34c0    running        z2  10.244.0.4
zookeeper/247623ea-8427-4f4a-939c-691faa7ef31f    running        z2  10.244.0.5
zookeeper/262baa62-d027-4dbc-b3be-b5bacd86cd20    running        z1  10.244.0.3
zookeeper/4c77e4e4-5452-4af0-afab-05f4f75bdaf3    running        z3  10.244.0.6
zookeeper/c80f4fd5-3d31-4c1a-a82c-68a166fad0a0    running        z1  10.244.0.2

6 instances

Succeeded
Errands
> bosh errands
Our zookeeper deployment has two one-off tasks, called Errands that we can run upon our deployment:
Name
smoke-tests
status
The purpose and behaviour of these two errands will be documented by the zookeeper-release project. From their errand name, and the output of bosh instances above, we can infer:
bosh run-errand smoke-testswill use a dedicated new instance to perform some sort of tests, probably upon the running clusterbosh run-errand statuswill check the local status of eachzookeeperinstance. Thestatuserrand does not have a dedicated instance, so we know it will be invoked within the running instances of the deployment.
The two errand names do not infer that they are destructive or harmful. Let's run them. Put on your cowboy hat.
> bosh run-errand smoke-tests
The output confirms that a dedicated instance is provisioned to run smoke-tests:
TODO: hilite=5,6
Task 6 | 09:17:12 | Preparing deployment: Preparing deployment
Task 6 | 09:17:12 | Warning: Ambiguous request: the requested errand name 'smoke-tests' matches both a job name and an errand instance group name. Executing errand on all relevant instances with job 'smoke-tests'.
Task 6 | 09:17:12 | Preparing package compilation: Finding packages to compile (00:00:00)
Task 6 | 09:17:12 | Preparing deployment: Preparing deployment (00:00:00)
Task 6 | 09:17:12 | Creating missing vms: smoke-tests/d688f60e-d34c-4e95-9a2c-44d246ad08b7 (0) (00:00:09)
Task 6 | 09:17:21 | Updating instance smoke-tests: smoke-tests/d688f60e-d34c-4e95-9a2c-44d246ad08b7 (0) (canary) (00:00:22)
Task 6 | 09:17:43 | Running errand: smoke-tests/d688f60e-d34c-4e95-9a2c-44d246ad08b7 (0) (00:00:17)
Task 6 | 09:18:00 | Fetching logs for smoke-tests/d688f60e-d34c-4e95-9a2c-44d246ad08b7 (0): Finding and packing log files (00:00:01)
Finally, the errand outputs all stdout and stderr it collected:
Instance   smoke-tests/d688f60e-d34c-4e95-9a2c-44d246ad08b7
Exit Code  0
Stdout     -----> simple test
           Successfully created value
           Successfully retrieved created value
           Successfully set new value
           Successfully deleted value
...

Stderr     2017/10/10 09:17:43 Connected to 10.244.0.3:2181
           2017/10/10 09:17:43 Authenticated: id=314976500763983872, timeout=4000
           2017/10/10 09:17:43 Re-submitting `0` credentials after reconnect
           2017/10/10 09:17:43 Recv loop terminated: err=EOF
           2017/10/10 09:17:43 Send loop terminated: err=<nil>

1 errand(s)

Succeeded
Personally I find it confusing that Stdout and Stderr are displayed in two separate sections. I'd like the output interlaced so as to give an indication when the Stderr output occurred relative to Stdout. But the errand Succeeded so I'll stop complaining.
One from one. Let's try the status errand:
> bosh run-errand status
The output confirms that no new dedicated instance is created, rather the errand is invoked upon the existing zookeeper instance group's instances:
Task 7 | 09:21:59 | Preparing deployment: Preparing deployment (00:00:01)
Task 7 | 09:22:00 | Running errand: zookeeper/262baa62-d027-4dbc-b3be-b5bacd86cd20 (3)
Task 7 | 09:22:00 | Running errand: zookeeper/05027f6c-c13f-493f-9f32-d45c46df34c0 (4)
Task 7 | 09:22:00 | Running errand: zookeeper/c80f4fd5-3d31-4c1a-a82c-68a166fad0a0 (0)
Task 7 | 09:22:00 | Running errand: zookeeper/247623ea-8427-4f4a-939c-691faa7ef31f (1)
Task 7 | 09:22:00 | Running errand: zookeeper/4c77e4e4-5452-4af0-afab-05f4f75bdaf3 (2)
Task 7 | 09:22:01 | Running errand: zookeeper/c80f4fd5-3d31-4c1a-a82c-68a166fad0a0 (0) (00:00:01)
Task 7 | 09:22:01 | Running errand: zookeeper/262baa62-d027-4dbc-b3be-b5bacd86cd20 (3) (00:00:01)
Task 7 | 09:22:01 | Fetching logs for zookeeper/c80f4fd5-3d31-4c1a-a82c-68a166fad0a0 (0): Finding and packing log files
Task 7 | 09:22:01 | Fetching logs for zookeeper/262baa62-d027-4dbc-b3be-b5bacd86cd20 (3): Finding and packing log files
...
The status errand output is specific to an Apache ZooKeeper status helper command:
Instance   zookeeper/05027f6c-c13f-493f-9f32-d45c46df34c0
Exit Code  0
Stdout     Mode: leader

Stderr     ZooKeeper JMX enabled by default
           Using config: /var/vcap/jobs/zookeeper/config/zoo.cfg


Instance   zookeeper/247623ea-8427-4f4a-939c-691faa7ef31f
Exit Code  0
Stdout     Mode: follower

Stderr     ZooKeeper JMX enabled by default
           Using config: /var/vcap/jobs/zookeeper/config/zoo.cfg
...
Delete deployment
The bosh delete-deployment command will destroy all running instances, and will orphan its persistent disks.
bosh delete-deployment
The orphaned disks are retained in case you notice the cowboy hat on your head and realise you've accidentally deleted your organisation's production cluster of ZooKeeper accidentally.
bosh disks --orphaned
Clean up
But today we are intent on cleaning up and shutting down our BOSH environment.
The bosh clean-up command will perform a decent job of removing any very old releases, and stemcells.
Today we will use bosh clean-up --all to destroy every BOSH release, stemcell, and orphaned disk that is not being used by a deployment. Since we have no deployments running anymore, this clean up command will purge everything.
> bosh clean-up --all
The output for this section will show release packages, release jobs, stemcells, and orphaned disks being deleted:
Task 9 | 09:33:53 | Deleting releases: zookeeper/0.0.7
Task 9 | 09:33:53 | Deleting packages: golang-1.8-linux/3eac55db0483de642b1be389966327e931db3e3f (00:00:00)
Task 9 | 09:33:53 | Deleting packages: java/c524e46e61b37894935ae28016973e0e8644fcde (00:00:01)
Task 9 | 09:33:54 | Deleting packages: smoke-tests/ec91e258c41471227a759c2749e7295cb65eff5a (00:00:00)
Task 9 | 09:33:54 | Deleting packages: zookeeper/43ee655b89f8a05cc472ca997e8c8186457241c1 (00:00:00)
Task 9 | 09:33:54 | Deleting jobs: smoke-tests/840b14bc609483bb03cf87a938bc69e76a6e2d88 (00:00:00)
Task 9 | 09:33:54 | Deleting jobs: status/1a6e60e211521487e4d03c8f7dc652b27a9ee368 (00:00:00)
Task 9 | 09:33:54 | Deleting jobs: zookeeper/17fe24515b0740d72b3ecdfe002bfaa6ae1771ca (00:00:00)
Task 9 | 09:33:54 | Deleting releases: zookeeper/0.0.7 (00:00:01)
Task 9 | 09:33:54 | Deleting stemcells: bosh-warden-boshlite-ubuntu-trusty-go_agent/3468 (00:00:03)
Task 9 | 09:33:57 | Deleting orphaned disks: 3f41e9a9-fa8b-43b8-5d52-2e59fa2dc7f4
Task 9 | 09:33:57 | Deleting orphaned disks: a7b695fe-032e-476b-4d88-ebbf9982ad38
Task 9 | 09:33:57 | Deleting orphaned disks: 1f73c1ea-0798-4c03-6569-ec12772f1922
Task 9 | 09:33:57 | Deleting orphaned disks: 01a49f13-0c88-4169-623c-31ddfa561b8c
Task 9 | 09:33:57 | Deleting orphaned disks: a9d0382a-ef40-4da9-5883-268934afd827
Task 9 | 09:33:57 | Deleting orphaned disks: a7b695fe-032e-476b-4d88-ebbf9982ad38 (00:00:00)
Task 9 | 09:33:57 | Deleting orphaned disks: 1f73c1ea-0798-4c03-6569-ec12772f1922 (00:00:00)
Task 9 | 09:33:57 | Deleting orphaned disks: 3f41e9a9-fa8b-43b8-5d52-2e59fa2dc7f4 (00:00:00)
Task 9 | 09:33:57 | Deleting orphaned disks: a9d0382a-ef40-4da9-5883-268934afd827 (00:00:00)
Task 9 | 09:33:57 | Deleting orphaned disks: 01a49f13-0c88-4169-623c-31ddfa561b8c (00:00:00)
Task 9 | 09:33:57 | Deleting dns blobs: DNS blobs (00:00:00)
Delete BOSH environment
Now that we have cleaned up our BOSH environment we can delete our BOSH environment. For this VirtualBox tutorial this will mean deleting the VirtualBox VM.
First, return to our bosh-env-vbox workspace directory:
cd ~/workspace/bosh-env-vbox
We need to run the same bosh create-env command as above, but using the delete-env subcommand instead. That is, the bosh delete-env command needs the same arguments used for the original bosh create-env.
bosh delete-env bosh-deployment/bosh.yml \
  --state vbox/state.json \
  -o bosh-deployment/virtualbox/cpi.yml \
  -o bosh-deployment/virtualbox/outbound-network.yml \
  -o bosh-deployment/bosh-lite.yml \
  -o bosh-deployment/bosh-lite-runc.yml \
  -o bosh-deployment/jumpbox-user.yml \
  -o bosh-deployment/uaa.yml \
  -o bosh-deployment/credhub.yml \
  --vars-store vbox/creds.yml \
  -v director_name="Bosh-Lite-Director" \
  -v internal_ip=192.168.50.6 \
  -v internal_gw=192.168.50.1 \
  -v internal_cidr=192.168.50.0/24 \
  -v outbound_network_name=NatNetwork
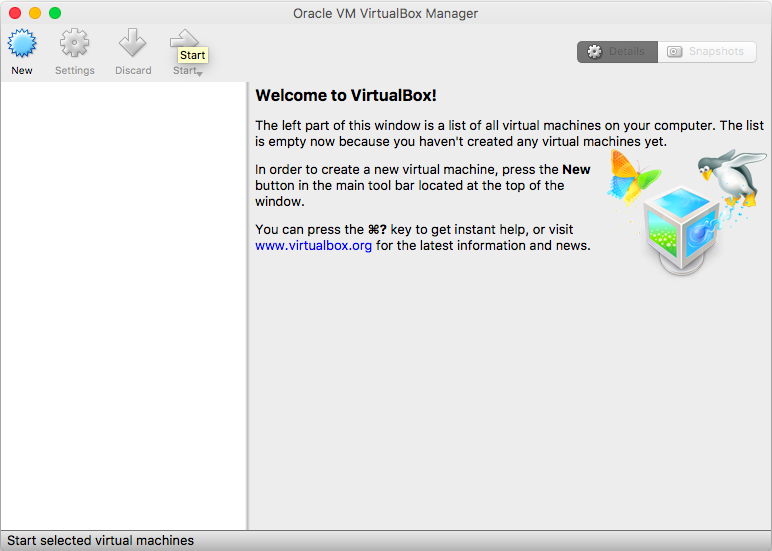
Visit the VirtualBox application to confirm the VM has been deleted: